How to add Custom Graphics to Instagram Reels 📲
Heads up: I use affiliate links for my fave products. If you click and purchase, I may receive a small commission at no extra cost to you.
HIT PLAY:
I was so excited when I realized you could add your own graphics to Instagram reels!
video transcript:
How to add Custom Graphics to Instagram Reels
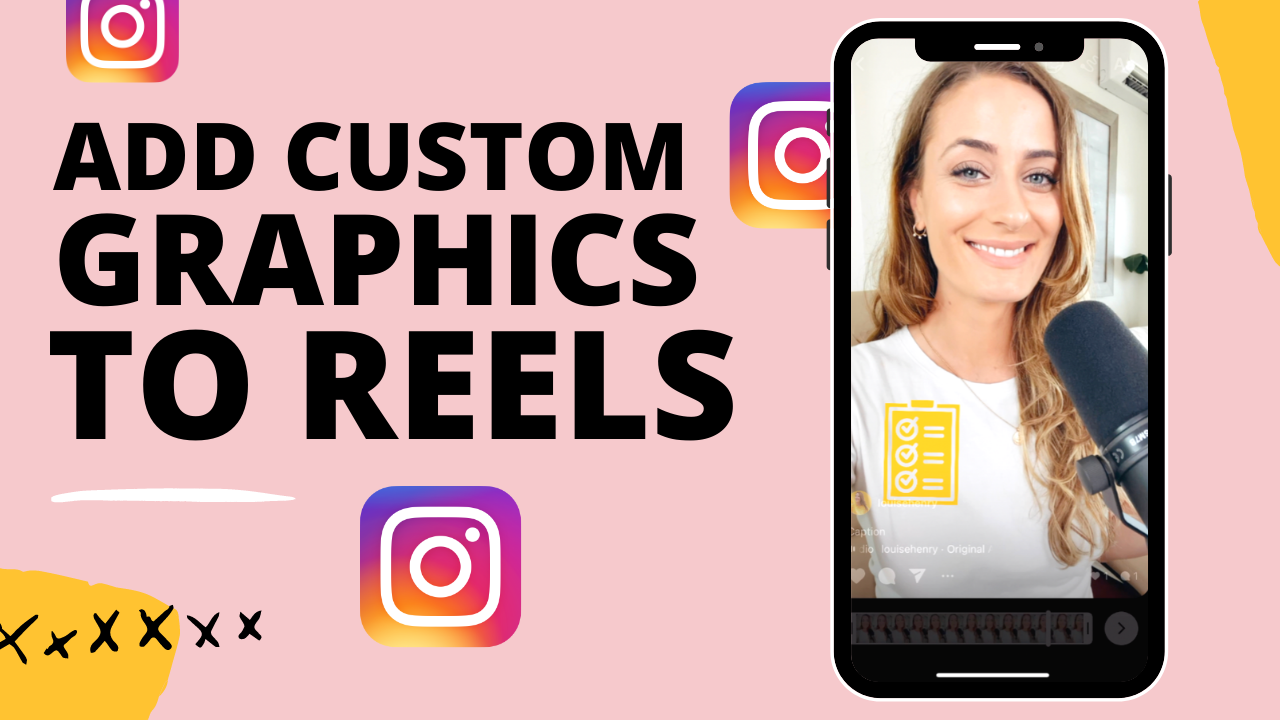
I had no idea that you could do this, which is why I’m creating this video today. You can add your own custom graphics to your Instagram Reels, and you can have them appear on your screen for just a limited amount of time. I’m super excited to share this training with you.
If you are new here, hi, I’m Louise of Louisehenry.com. Here on this channel, I talk all about building an online business, and content is obviously a huge piece of that, so I often share tips and tricks for creating your content.
Let’s dive in.
Create the Graphics
The very first thing you need to do is grab the graphics that you want to add to your reel. It is very likely that you’re going to want to use graphics with a transparent background, so that there is no background behind your graphic. For this, we, of course, are going to use Canva. You can use any dimensions that you want for this. I’m just going to hit Create A Design, Custom Dimensions, and do 1000x1000 pixels, and Create New Design.
For this example, let’s pretend that we’re doing a promotion for my online program, Uplevel with Asana. I’m going to want to use an icon of a little planner, and my logo as well. Let’s go over to Elements and then we are going to search for a planner. Then you’re just going to find one that you want to use. For example, I’ll go with this one. Then I’m going to resize it so that it takes up most of the space here. I’m going to change it to one of my brand colors, so I’m just going to click on this square right here and select one of my colors. You can do that if you have Canva Pro – you can save your colors. If not, you can always click New Color, select from the color wheel, or you can paste in your Hex code here. Then I’m going to do another page - this time, with my logo.
So, we have the two graphics that we want to add. You are going to want to download with a transparent background, so this is reason to upgrade to Canva’s paid plan – Canva Pro – because it will allow you to get this Transparent Background. I’m going to click on that and then Download. From here, all I need to do is get these over to my phone - I always just AirDrop it to myself.
Add Stickers
Once you’ve AirDropped it to yourself, you can just open up Instagram, go to your Profile, then click on the plus (+) sign to create a Reel. Then you’re going to swipe up from the bottom and select the video clip that you want to use for your reel. I’m just going to use this quick demo clip here, then hit Add, and then click on the arrow pointing to the right.
Then, open up your Photos, which is where you’ll see your graphics that you want to add. I’m going to start with this planner one. I’m going to click on it, click on the share arrow, bottom left of your screen, and then Copy Photo. Then I’m going to go back into Instagram and now you will see Add Sticker. I’m going to click on that and then I can move this around and place it wherever I want. I can also pinch inward on it to make it smaller, or outward to make it bigger. Let’s make it smaller, and maybe we place it up here. OK – just example purposes.
Control Display Length
Then, what’s really cool, is that we can control how long it stays on our screen with these white sliders at the bottom here. I’m going to pull it back from the side here, so that it’s only showing up for the beginning part of this video. As you can see, it’s only showing up right at the beginning.
Now, let’s go back into Photos and do the one with my logo. We’re going to open that up, click again on that share arrow, bottom left, then Copy Photo, open up Instagram, hit Add Sticker and we now have that logo in here as well. I’m going to place that logo where I would like it, and then I can decide how long I want that one to appear onscreen as well. For example, I’m going to have this show up just at the end, so I’m moving the slider over to the right. Perfect. Now I’m going to click on the arrow and then you’re just going to share it out. So, write a caption, select your cover, and then hit Share.
There you have it. That’s how you add custom graphics to your Instagram Reels. I hope that you have a lot of fun with this and that it allows you to add even more creativity to your reels.
Thank you so much for watching this video. If you liked it, let me know by giving it a thumbs up. Don’t forget to hit Subscribe if you haven’t yet, and I’ll see you soon with another video.
GET YOUR FREE ROADMAP HERE:


Save time & mental energy by setting up Asana rules!